Back in the 60's my in-laws, Jack and Jean Jones, were living in El Paso with their three small children. They bought a beautiful spot of property in the mountains of southern New Mexico, and whenever they had a minute - weekends, vacation time, etc. - they traveled up to the mountains to build their new home there. Pretty amazing, when many adults these days can't build a simple shelf! While they worked on the house, they lived in this little camper.

All of them. Two adults, three children. I still can not wrap my mind around that.
In the years since then, the camper has been used for various storage purposes, and the trees that were tiny saplings 50+ years ago are now tall and solid...and have cut off any chance of removing it easily.

It sits maybe 30 feet off our back door. I stuck my head in once shortly after we moved in, and decided to pretend it just didn't exist until we could get rid of it.
Then, while we were taking a walk one night and I looked up at it from the road, the thought popped into my mind that it might actually make a cute play house. I made the mistake of thinking out loud, and the kids pounced. PLEASE, Mom??? I needed another project, right?
First to take stock of the situation.

Hmm.

Erm.

Is that a saddle?
Okay, obviously the first thing to do is empty it out. Considering all the other creatures that have obviously called it home, I didn't let the kids help, but they were fascinated. I had to draw an imaginary perimeter for them to stay outside of, but they stood with toes at the edge, watching and commenting.
My first thought was to tear out the old appliances, but then I thought what's a play house without a play kitchen? And the old fridge is just so cute!

Well, it could be...with some scrubbing...and fresh paint...and if I can fix that bottom part...

Yes, I wore PPE!

Yes, that is somebody's old nest, with inches-thick layers of poop and pee underneath. Every enclosed area (and several not enclosed) were like that. LOTS of scrubbing to do.
And I see those pink leggings, young lady - bringing my camera to me does not give you permission to stay inside the imaginary perimeter. Scoot.
Oh hey, look, masks!

HOW are those still white? I'll just use my own, thanks.
Now this box is worth sorting through:

Some useful treasures gleaned from the piles:

And at the end of stage one we have:

Needs a new floor, and I think I will add shelves. May as well cut the pipe out and seal it, we won't be running anything through it.

Drawers all removed for scrubbing/bleaching. Seat cushions tossed, springs and all. Table seems usable but needs new hinges. Lots of windows!

The bathroom...is another story. Here I unearthed the only actual mouse. She was displeased. Lots of floor damage. If all else fails I may just seal the whole thing off. But...it would make a cozy reading nook...

Next up...dump run!

Several dump runs, actually (thanks Daddy!) Christopher was a huge help moving trash to the driveway, en route to the dump, but I still wasn't ready to let the kids do more than peek inside. It would be a bit ironic to miss coronavirus only to come down with hantavirus!
I filled the shop vac twice with mouse turds and acorns, which was just a start. All of the drawers were scrubbed, soaked in bleach water, and then painted.

Blue? Why not. I happened to have a can of blue spray paint, and the kids are already planning a tie-dye color scheme!
I didn't get a 'before' of this cute stool, but it was already a faded yellow, so I just brightened it up.
 |
| Note supervisory chickens. |
It immediately became The Favorite Chair. As in, the one everyone keeps fighting over...
Next up inside was tearing out the old flooring. I think it used to be some type of linoleum...

Sigh of relief that the floor underneath was in pretty good shape! Some of the lino came up in good-sized chunks. Other parts came up in teeny. tiny. chips.
I decided to remove as many pipes and wires as I could to make cleaning and remodeling easier - we won't have water or gas run to it, and any electricity will be battery powered or via extension cord. Of course, everything was on there TIGHT! After struggling with the line to the stove, we decided to just go ahead and cut through it all. By "we" I mean I decided, and Mike got to cut.


There was an earlier water leak over the stove that damaged ceiling and wall. Since the cabinet there was out of kids' reach anyway, I decided to take it out. I forgot to get a 'before' picture, but despite it being crumbly it took a bit of work to remove. I started out with a flat bar, but the wall was too spongy to get any purchase. I ended up using a combination of screwdriver and good old hit-it-with-a-hammer. The screws were all, of course flat heads.

I hate flat head screws. With a passion. And, of course, it was open to the cabinets on the other side, so I will need to seal that up, but it's not as bad as...

Yeesh. Looks awful, but a pretty easy fix. I ripped out the worst parts (guess I shouldn't have bothered washing my hair this morning), and later we will put new wood over the old.
Another issue area is the far end of the camper. Slight water damage, but mostly the gap open to the outside is the problem! The curve of the wall made simply filling it in a bit tricky, so I decided to put in a low bench and just cover/seal it all that way. That also takes care of the hole in the side of the cabinet where the piped ran through.

Like my flyaway hair in the corner? And the egg sacs on the wall. I did relocate one black widow who was living in the kitchen area, but we don't mind other buggies.

Much better!
And then there was this thing, just begging to smack someone's shins.


And...(drumroll please)...
Before again:

And after:

Before:

After:
Needs curtains (ordered on Amazon). Isn't the phone awesome? Yard sale find!
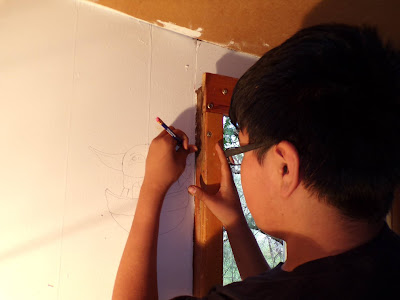
Grace's artwork: sky, sun, flowers, grass. And the brown is...because it's raining poop.
I need to remove the white paint on the cabinet, and curtains are coming for this window too. The kids are having a BLAST pretending to cook things!
Before:

After:


And finally, the bathroom, which I came close to sealing off and ignoring:
Before:

And after:

My plan is to decoupage the walls with pages from discarded books, but it is already quite easily the favorite spot - and pretty comfy (of course I had to try it out first!)
So, it's pretty much done except for some finishing touches! What ever will I do with all my time now?
Cue child yelling from the back porch...

Sigh.

Much better!
And then there was this thing, just begging to smack someone's shins.

Why????
I cut that off and then sealed the insides of the cabinets and the floor with a coat of elastomeric.

I can tell you one thing, it sure smelled a lot better in there at this point!
At this point (I had also been scrubbing with disinfectant over and over), I decided it was safe enough for kids to come in. They were SO excited!

And immediately left their stuff all over.
Now that they can come in, I can put them to work.

I scrounged the 2x8s at the local Restore. Not pretty, but sturdy enough for my purposes.

The counter top had seen better days.

I may go through and put linoleum over it later, but for now another good scrubbing and contact paper will do.

Don't you love how much face cuts bleed?

Don't ask.
Now for a little wood...

A little primer...

Some finishing touches...


 |
| All items found while we were emptying the camper out. |
And...(drumroll please)...
Before again:
And after:

Before:
After:
 |
 |
 |
Before:
After:
 |
| Christopher's artwork. Chickie nuggies!. |
 |
| Sheridan's artwork (latest obsession). |
Before:
After:

That's the drive-up window for the taco truck/cafe/whatever it is this week.
 |
| Logan's art, and the phone number for the kids' taco shop! |
Before:
And after:

My plan is to decoupage the walls with pages from discarded books, but it is already quite easily the favorite spot - and pretty comfy (of course I had to try it out first!)
So, it's pretty much done except for some finishing touches! What ever will I do with all my time now?
Cue child yelling from the back porch...

Sigh.