Showing posts with label home repair. Show all posts

Wednesday, April 11, 2018

This is How We Party!

We have a whole week off school and work, and our tax refund came in, so you know what that means/ right?

Yep, time to hit the honey do list!


A few things got done before Spring Break. The ceilings have been bare drywall for the past 50 years (No, really. 50 years.) Now they are taped, mudded, textured, and painted.


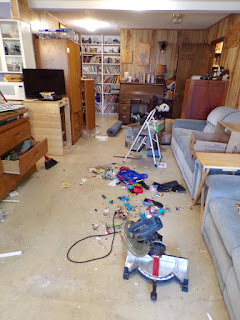
The floor got textured, too. 


Fortunately, the floor was the next project.

Before:


After:


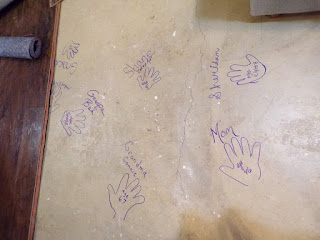
With a little artwork in between:


Now for the 'fun' project, the one we kept saying needs to be done, but which we knew was going to take more than a day, so we hadn't actually started it. There is a fantastic shop built into the house, about 12 feet wide and running the entire length of the house (a little over 50 feet). 


Unfortunately, the ceiling under that black plastic looks like this all the way through:


which means everything inside has been getting rained on for years. And there was a LOT of stuff in there. This is after I had already spent a day and a half pulling things out (I never remember to take 'before' pictures!):


But there are treasures!


Those were inside this:


Yes, a beautiful wood burning cook stove. That can stay where it is!

We rented this to help with the rest of it, which took much of the week to sort through:


While Mike tore the old roof off, I tackled an old shed elsewhere on the property. Unfortunately, some weather damage in there also, but there were more treasures:


Brian is now a married father of two. And still has lousy handwriting.

Canning jars! On the first day alone, I disinfected 197. 


My hands are TRASHED. I disinfected in bleach water, and everything I did all week meant frequent hand washing. I think my hands are rough enough to use as sandpaper, should I get around to refinishing the dining room table.

Meanwhile, back in the shop...look, plenty of natural lighting!


And new floor joists, at a slight angle to run water away from the house.

Next day, decking:


which will soon be covered in metal. For now they will be re-covered in plastic, but that should be enough to prevent leaks. Let the clean-up continue!

Once the new roof was up (and that part was all Mike!) I could start clearing off the shelves. I decided to freshen up and re-seal with old paint.


More treasures! 


Finally, ready to fill back up again!


A coat of fresh paint outside, too:


Now, to figure out where all of this is going to go., before it rains again...


We also did a few smaller projects, like putting flooring down in the upstairs hall:

Partway through (again, forgot to take 'before' pictures):

Blurry cat head not part of project.

After:


New source of entertainment: watching the dogs take that corner to the bedroom each night.

We finished turning the old shed into a chicken coop, and moved our six ladies over from Grandma's house.


I also dug some irrigation ditches, painted the outside porch area, spent a day freezer cooking, and got everyone to a scout trip, a birthday party, and a Fire Department Auxiliary meeting. And 5 out of seven of us got sick at one point or another. Happy to be back at work this week, where I can REST!


Monday, May 1, 2017

On the Move Part 3

As we finished up the kitchen, I made the mistake of remarking to a few people that the kitchen was the only room that really needed a lot of work.

We knew that parts of the deck needed to be replaced before we could move in - because furniture for the entire second floor needs to come across it, and it was a bit spongy in places.


Just tear off the old plywood, put down new plywood, and seal it, right?


Oh.


Okay, plan B: Tear off definitely-not-just-soft plywood, replace floor joists...throw back out...THEN replace plywood.


Then rest! The sealing can happen another day...after it finishes raining...


Friday, April 21, 2017

On the Move - the Kitchen (with Guest Contributor Sheridan)

There was a movie out some time back, based on a popular kids' book, that started out with the mother declaring in wonder that she was "done" with the house. The last bit of decorating, the final curtain in place, everything in the house was the way she wanted it.


So, of course, the husband immediately announced that they were moving.

I can't say that I was finished with the house we have lived in for almost 8 years, but my 'to do' list was down to things like "finish trim in bathroom". Little stuff. So, of course, what idea did a certain husband come up with?

On the other hand, when you get a chance to trade a 4 bedroom 2 bath house for a 6 bedroom 3 bath, you can't really complain too much - even if it means your 'to do' list now says things like "replace entire septic system".

My New House by Sheridan

You all ain't going to believe this stuff.

We are moving to our Grandma's house. Deer go to our Grandma's house. She died in August. It was close to Thanksgiving when she died. We still miss her. We are sad she died.

Now let's just get back to the good stuff. She has a lot of flowers at her place. It is very nice. There are a lot of toys there. 

The end.

This was the house my husband and his sisters grew up in - the family built it themselves when the kids were tiny, living in a trailer on the property the entire time. I love that it has such a personal history, and the 'bones' of the house are great, but of course after 50 years any house needs a few updates. If you have followed me for any amount of time, it won't surprise you that the first room I tackled was the kitchen!

Here are some 'before' pictures:

While I like natural wood, the cabinets were a bit too dark for my taste. The kitchen is also on the small side, so I needed to brighten it and make it at least feel bigger.


The miscellaneous wires on the top were also a tiny issue (they had conduit around them, so they weren't dangerous, just not pretty!)


The above wall was between the living room and kitchen, and while I wanted to be able to see what the kids were doing in each room, I didn't want to lose cabinet space.


The ceiling was dry walled a while ago, but the taping never got done. Or, obviously, the painting. That was not helping the general darkness of the room. There were several lights plugged in under the cabinets, adding illumination but taking up half the outlets.

So...the cabinets. We completely removed the cabinet on the wall between kitchen and dining room, and set that aside for later. Next I took all the doors off the upper cabinets. Five minute task, right?

Two words that should be banned from the English language: flathead screws. Tiny ones. My cordless screwdriver, and even my regular old manual, couldn't get a grip. I ended up using a small knife to take every. single. screw. out of every. single hinge. Did I mention I only had a couple hours at a stretch to get anything done there?

FINALLY, after the doors were off and many years of grease had been scrubbed away, I was able to fill in holes and paint them. I love Behr, it covers everything beautifully! It also dries quickly, so by the time I got to the end of the cabinets with the first coat, I was able to go right back to the beginning and apply the second coat.

Of course, that made the walls look REALLY bad.


I CAN paint neatly, but if I know I'm doing the walls anyway, I'm not going to bother. I took a piece of the blue and white Pfaltzgraff that belonged to my mother in law to the paint store to match the color, and used that on the walls.

While I was painting the cabinets, walls and ceilings, Mike was covering them all with dust. That wall between the kitchen and living room? All gone! Except for a 2-foot wide strip to hold my spice racks, because that was one part of last year's remodel that I refused to give up!

Just a teensy bit of rewiring to do, too.

Now, since the original counter had a back splash, it wasn't going to work without a wall to back it up. Fortunately, some 8 or 9 years ago, I bought a 14-foot conference room table...which has been sitting in our garage since then, because our floors wouldn't support the weight. The top is in two pieces, and they are HEAVY. I should mention that this is about the time I got sick, and my muscles were like rubber. I wasn't much help wrestling a piece onto the sawhorses,


and did absolutely none of the measuring and cutting! Mike did a FABULOUS job, cutting it so perfectly on the first try that we didn't need to cover the gaps with trim like we expected (there weren't any!)

Are you ready for the "after" pictures? Here they are with the befores again:


Still need to box in that vent and paint it, then finish the trim around the ceiling.


The dishes (brown) that go on the bottom shelves are still at the old house. Yes, the cabinets are slightly bowed (but strong and solid), which was not noticeable with the doors on, and which is driving Mike crazy. I don't care, I think it adds character. The plates aren't on the outlets yet because we are switching the off-white out with white ones.


Obviously still some finishing to do, but what a difference!

Of course, now you can see how much needs to be done in the other rooms, but that's mostly finishing work (ceilings and flooring) as well.


When we sent pictures to my older daughter, who grew up there, her first comment was, "Holy WOW!" Just a bit of a change! I'm glad she (and the others who have seen it so far) approve, that was very important to me. I love that I can see the living room, that everything is so open, and I LOVE LOVE LOVE having a 4x6 foot counter top! That is going to be so perfect for parties!

Speaking of parties...we still have the rest of the house to do...who is up for a how-much-furniture-can-you-fit-in-your-truck fiesta???

***Bonus treasure hunt: How many times can you spot my travel mug in the pictures???